The ultimate LangChain series — Pinecone vector database
Learn how to upload the documents you loaded into a vector database. Pinecone edition.
Hey there! I'm Davide, a passionate developer advocate at Chainstack, the leading suite of blockchain infrastructure services.
I'm dedicated to empowering current and aspiring web3 developers by sharing valuable content and resources.
Within my articles, you'll discover a treasure trove of straightforward projects designed to bolster your understanding of fundamental Python, Solidity, JavaScript, and web3 skills. Whether you're a seasoned developer or just starting out, these projects offer an ideal learning path for honing your abilities in the exciting world of blockchain development.
Feel free to explore my articles, and let's embark on this remarkable journey of mastering web3 together!
Introduction
In our last guide, we went into the theoretical aspects of vectors within LLM and vector databases. We also got our hands dirty with practical applications, learning to utilize the Activeloop vector database with LangChain. We're about to embark on a new journey learning to use Pinecone - another popular solution for hosted vector databases.
Check out the previous article if you need an understanding of vector databases: The ultimate LangChain series — Embeddings & vector stores Activeloop edition
How to use Pinecone with LangChain
This article will be shorter since we can jump straight into coding. We'll index the same video from the Fafo and Chill podcast we host at Chainstack; first, don't forget to get your API keys:
In this article, we're going to cut to the chase and dive right into the coding. We'll be indexing the same video from the FAFO and Chill podcast we host at Chainstack. But before we get started, remember to have your API keys ready:
OpenAI API key for the embedding model.
Load the data
The initial steps of loading the data and splitting it into chunks are pretty much the same; we just need a different import since we'll use the Pinecone integration; also, remember that your environment should already be set up with the Pinecone client library. Follow the environment setup guide in case you missed it.
The main difference is that we import the Pinecone client and LangChain integration instead of Activeloop's.
import os
from langchain.document_loaders import YoutubeLoader
from langchain.text_splitter import TokenTextSplitter
from langchain.vectorstores import Pinecone
import pinecone
from langchain.embeddings.openai import OpenAIEmbeddings
from dotenv import load_dotenv

load_dotenv()

# Load the video
video_url = "https://www.youtube.com/watch?v=nFFA0lFswSA"
loader = YoutubeLoader.from_youtube_url(video_url, add_video_info=True)
video = loader.load()

# Split text using the TokenTextSplitter
text_splitter = TokenTextSplitter(
    chunk_size = 250,
    chunk_overlap  = 20,
    add_start_index = True,
)

print('Splitting in chunks...')
split_video = text_splitter.split_documents(video)
print(f'Created {len(split_video)} chunks.')
As you can see, up to here is all the same.
Pinecone indexes
Now we have to set up Pinecone; we need to create an index, and there are two ways to do it:
Manually from the platform
Programmatically using the Python Pinecone client package
An index in Pinecone is basically a container for your vectors; it stores vectors and executes queries on the vectors within its storage; it allows for more operations, but this is all we need now.
We'll learn both ways, but start from the manual one.
Learn more about Pinecone indexes from the official documentation.
You'll first need to manually set up an account to create an index. Once that's done, navigate to your project and select Indexes, followed by Create index.
At this point, you'll be prompted to enter some configuration details. These include a name, dimensions, and metric. Feel free to choose a name that suits you, but try to keep it short. I've found that overly lengthy names can sometimes trigger errors, though the exact reason remains unclear to me.
The dimensions and metric are about the vectors themselves. Given that we're using OpenAI embeddings, we'll set the dimensions to 1536.
As for the metric, this determines how the similarity between vectors is calculated. We'll opt for the cosine metric, as this is the recommended choice by OpenAI.
TL;DR:
Name: keep it short
Dimensions: 1536
Metric: cosine
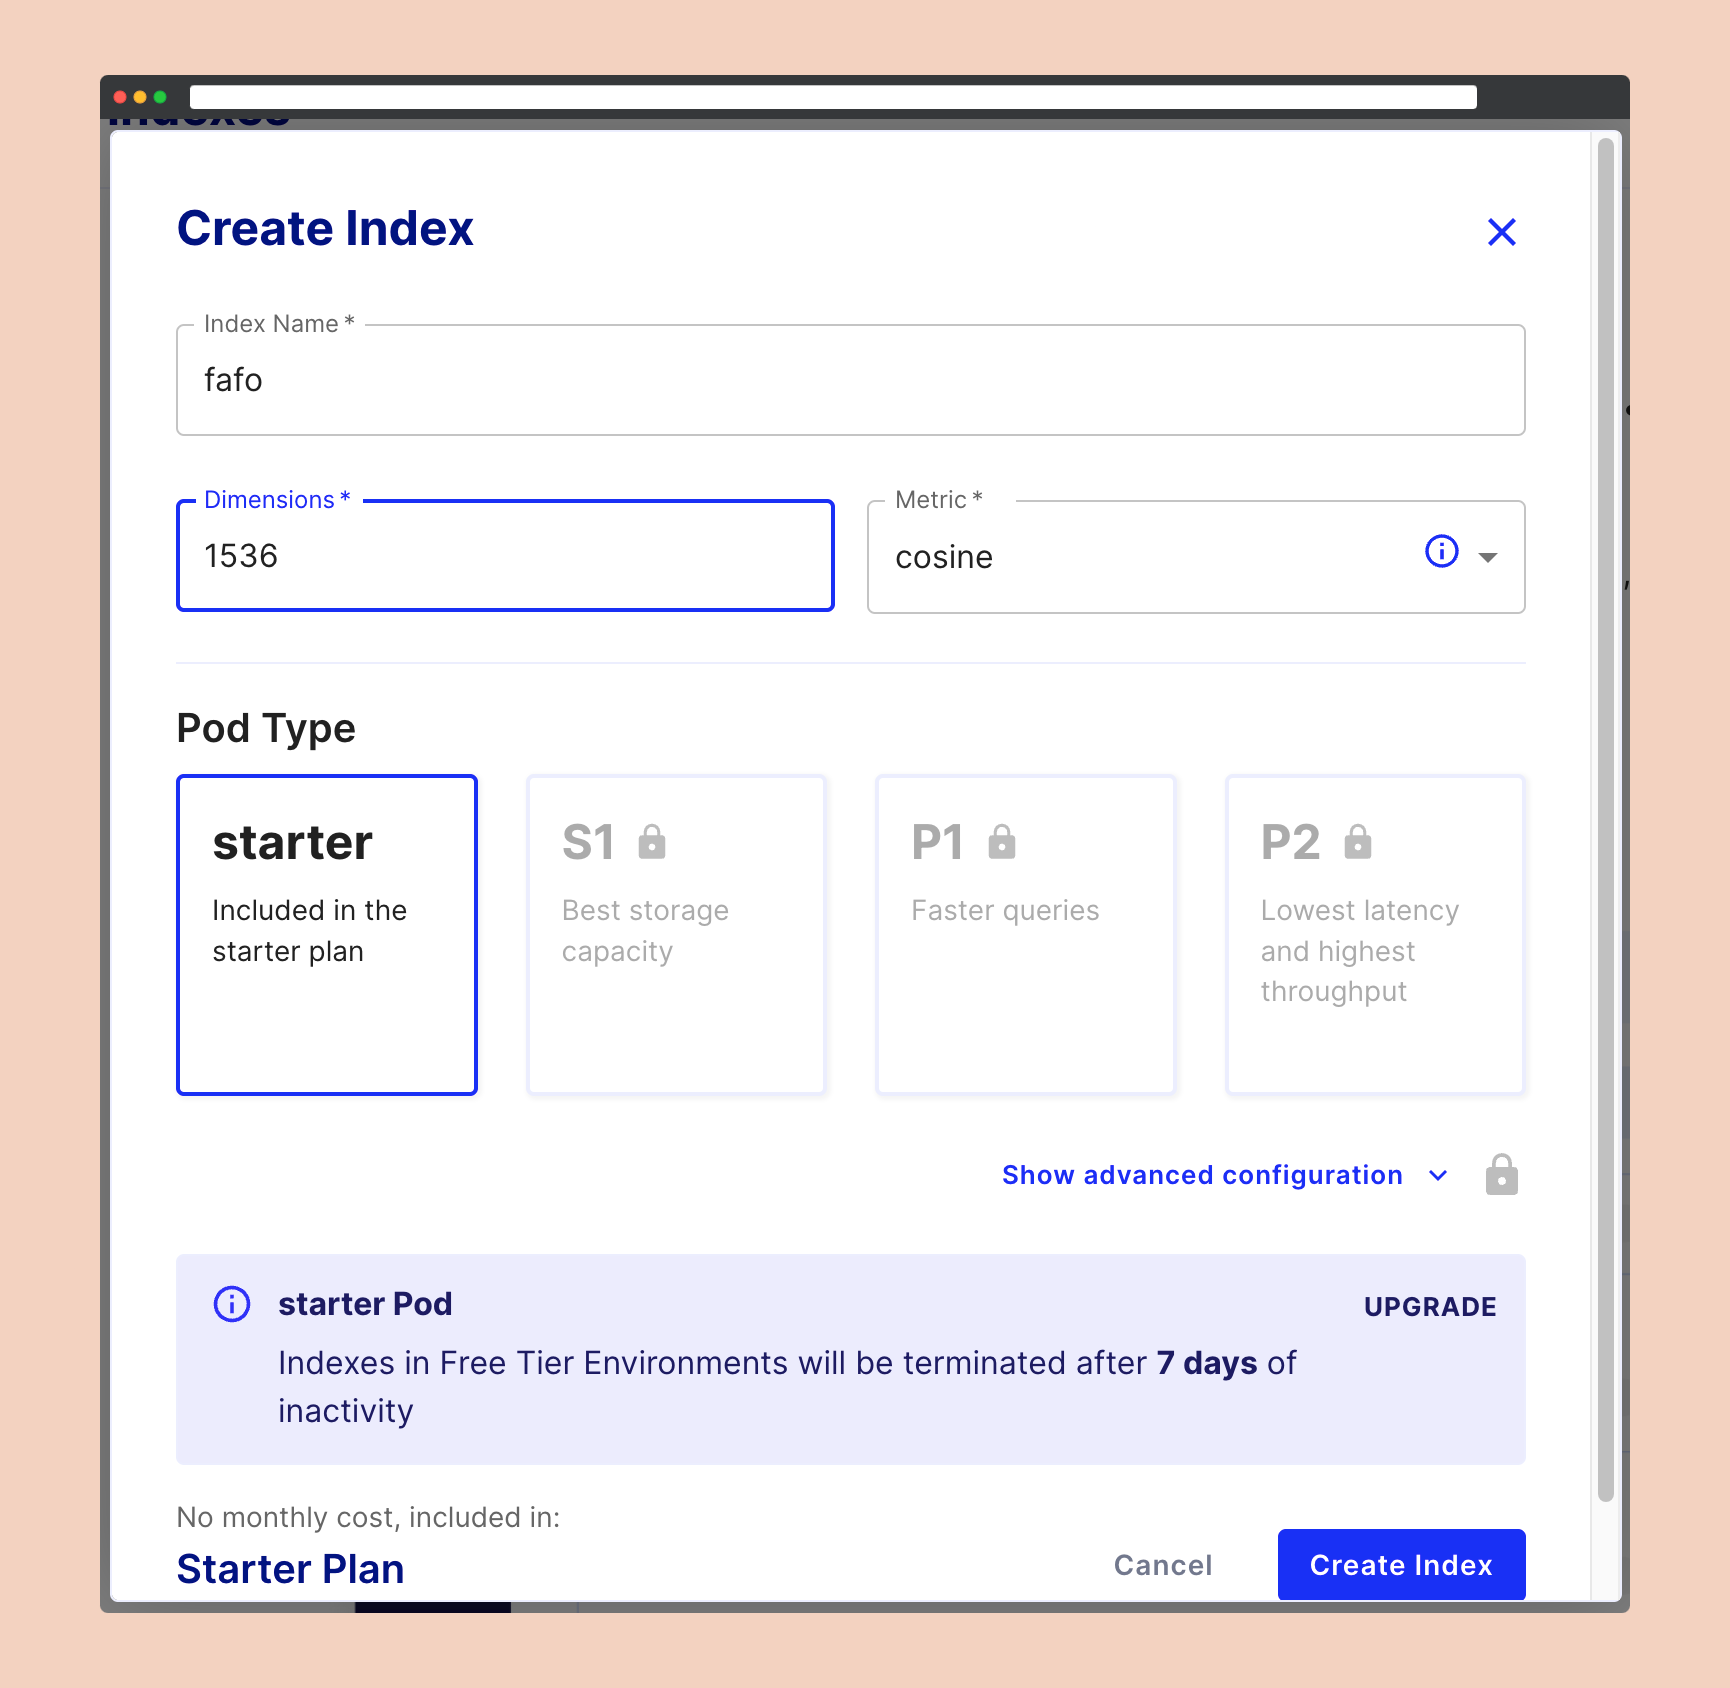
Since we are on the free plan, we cannot access other settings.
Creating the index might take a few minutes. Once it's ready, you'll need to find and copy the environment string displayed on your dashboard. This will be needed for using the Pinecone client.

Well done! You've successfully created an index in Pinecone. Now, let's move on to setting up a .env file. This will help us manage API keys and other configurations in a secure and organized manner.
Create a file named .env in the root of your project and paste and fill in the following:
# OpenAI config
OPENAI_API_KEY="YOUR_API_KEY"
EMBEDDINGS_MODEL="text-embedding-ada-002"

# Pinecone config
PINECONE_API_KEY="YOUR_API_KEY"
PINECONE_ENVIRONMENT="YOUR_ENVIRONMENT"
PINECONE_INDEX_NAME="YOUR_INDEX_NAME"
PINECONE_INDEX_DIMENSION="1536"
PINECONE_INDEX_METRIC="cosine"
Now we can continue with our script; the first step after loading and splitting will be to initialize the environment variables, initialize the embeddings model, and the Pinecone client:
# Init API keys & Pinecone config
os.environ['OPENAI_API_KEY'] = os.getenv('OPENAI_API_KEY')
PINECONE_API_KEY = os.getenv('PINECONE_API_KEY')
PINECONE_ENV = os.getenv('PINECONE_ENVIRONMENT')
PINECONE_INDEX = os.getenv('PINECONE_INDEX_NAME')
INDEX_DIMENSIONS = os.getenv('PINECONE_INDEX_DIMENSION')
INDEX_METRIC = os.getenv('PINECONE_INDEX_METRIC')

# Get embedding model from .env
EMBEDDING_MODEL = os.getenv('EMBEDDINGS_MODEL')

# Config embeddings model
embeddings = OpenAIEmbeddings(model=EMBEDDING_MODEL, disallowed_special=())

# Init the Pinecone client
pinecone.init(
api_key=PINECONE_API_KEY,
environment=PINECONE_ENV,
)
The Pinecone client is our primary tool for interacting with the platform. In this instance, we'll be using it to upload vectors to the database. However, we'll use it later to create the index programmatically before uploading the vectors.
The next step is the generation of embeddings and upload; as usual super easy thanks to LangChain; it's actually one line of code 🤯 but I added a couple of print statements to keep track of what's happening:
# Upsert chunks to Pinecone vector DB
print('Uploading to Pinecone...')
docs_upload = Pinecone.from_documents(split_video, embeddings, index_name=PINECONE_INDEX)
print('Vector DB updated.')
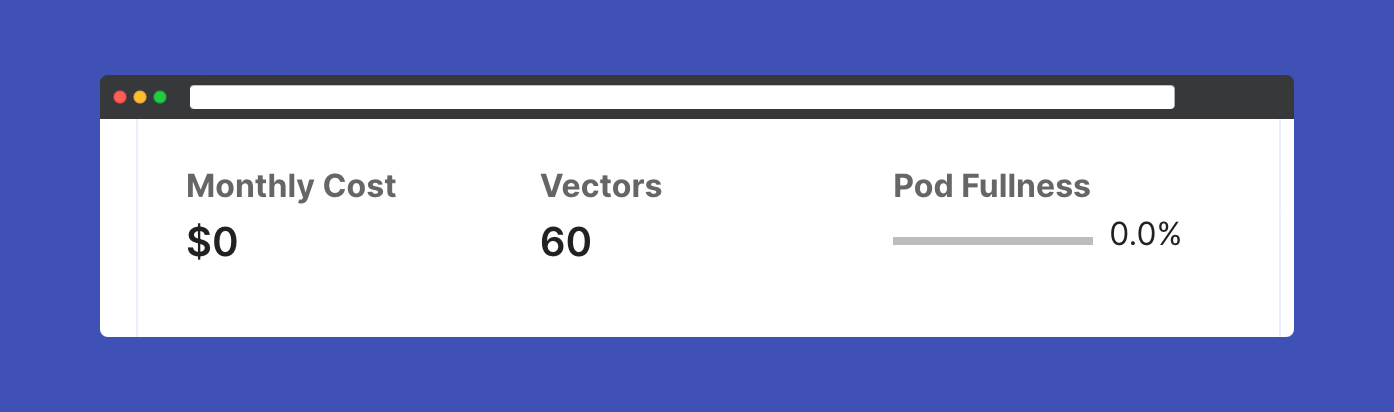
Running the script will give you the following response in the console:
Splitting in chunks...
Created 60 chunks.
Uploading to Pinecone...
Vector DB updated.
You can verify the upload is complete from the dashboard, where you will see 60 vectors in the database.
Full code— manual index
This is the full script for the manual index:
import os
from langchain.document_loaders import YoutubeLoader
from langchain.text_splitter import TokenTextSplitter
from langchain.vectorstores import Pinecone
import pinecone
from langchain.embeddings.openai import OpenAIEmbeddings
from dotenv import load_dotenv

load_dotenv()

# Load the video
video_url = "https://www.youtube.com/watch?v=nFFA0lFswSA"
loader = YoutubeLoader.from_youtube_url(video_url, add_video_info=True)
video = loader.load()

# Split text using the TokenTextSplitter
text_splitter = TokenTextSplitter(
    chunk_size = 250,
    chunk_overlap  = 20,
    add_start_index = True,
)

print('Splitting in chunks...')
split_video = text_splitter.split_documents(video)
print(f'Created {len(split_video)} chunks.')

# Init API keys & Pinecone config
os.environ['OPENAI_API_KEY'] = os.getenv('OPENAI_API_KEY')
PINECONE_API_KEY = os.getenv('PINECONE_API_KEY')
PINECONE_ENV = os.getenv('PINECONE_ENVIRONMENT')
PINECONE_INDEX = os.getenv('PINECONE_INDEX_NAME')
INDEX_DIMENSIONS = os.getenv('PINECONE_INDEX_DIMENSION')
INDEX_METRIC = os.getenv('PINECONE_INDEX_METRIC')

# Get embedding model from .env
EMBEDDING_MODEL = os.getenv('EMBEDDINGS_MODEL')

# Config embeddings model
embeddings = OpenAIEmbeddings(model=EMBEDDING_MODEL, disallowed_special=())

# Init the Pinecone client
pinecone.init(
api_key=PINECONE_API_KEY,
environment=PINECONE_ENV,
)

# Upsert chunks to Pinecone vector DB
print('Uploading to Pinecone...')
docs_upload = Pinecone.from_documents(split_video, embeddings, index_name=PINECONE_INDEX)
print('Vector DB updated.')
The next step is the same, but we'll include some code to create the index first.
Programmatic index
Now, let's walk through how to check if an index exists and how to create one if it doesn't. We'll be doing this using the Python Pinecone client.
Check the API reference on Pinecone
All we have to do is to use the list_indexes method to check if we have indexes ad the create_index method in case we don't. Everything up to initializing the Pinecone client is the same; then, let's implement the logic to check if an index exists and create one if it doesn't.
This checks for indexes, and if the list is empty, it will create one following the specs from the .env file and upload the vectors:
indexes_list = pinecone.list_indexes()

if not indexes_list:
    print('No index found!')
    print(f'Creating index named {PINECONE_INDEX}...')
    pinecone.create_index(PINECONE_INDEX, int(INDEX_DIMENSIONS), metric=INDEX_METRIC)
    print(f'Index {PINECONE_INDEX} created.')


# Upsert chunks to Pinecone vector DB
print('Uploading to Pinecone...')
docs_upload = Pinecone.from_documents(split_video, embeddings, index_name=PINECONE_INDEX)
print('Vector DB updated.')
Note that it might take a few minutes to create and initialize the index.
Congratulations! You've now mastered the art of creating indexes in Pinecone, both manually and with the aid of the Python client. However, it's important to note that the provided code lacks the logic to verify a specific index name or to update the vectors. If executed multiple times, it will upload new vectors each time, even if identical vectors already exist in the index.
Also check out this repository I made where there is a helper file to use the Pinecone client.
To reinforce your understanding, consider implementing logic to locate specific indexes and organize vectors by documents as a practical exercise. This will test your knowledge and enhance your proficiency in managing and optimizing your Pinecone indexes.
The next step is using LangChain to query the database and get some questions answered!